Amigurumi Cacti | Great Stocking Stuffers for Xmas!

Greetings fellow Crochetists/Cactorians :)

I just wanted to share with you my awesome discovery at the Kalamunda Markets this month!
I made a set of amigurumi cacti to sell at our stall (where we usually sell real cacti and succulents) and they were a huge hit! Completely sold out!

Many jokes flew around the place about how these cacti are guaranteed 'unkillable' (until one customer said "I have 3 children. I wouldn't say guaranteed un-killable if I were you!") .

Then one customer mentioned how these would make great stocking stuffers for Christmas. What a great idea! They are easy to make, they look great, and are so much cheaper (and healthier) than filling stockings to the brim with chocolate!

So I know what everyone in my family is getting this Christmas!

Amigurumi Link | Legend of Zelda

The Legend of Zelda takes me back to my high-schoolie days - Sitting cross legged on the floor of my lounge room, intently staring at the tv screen with a Nintendo 64 controller in one hand and a can of Dr Pepper in the other. My mother vacuuming around the spot I am sitting on. Calling my friend who is inevitably stuck at the same spot I am in some temple, trying to nut out how to get past the seemingly impossible puzzle - "But what if we use the fire arrows to light the torch that will lower the bridge that leads us to the chest with the boss key in it?"
Hehehe, good times...

So, when I saw a pattern for an amigurumi Link on the net, I just HAD to make my very own!!!
The original pattern is by an amazing japanese artist, Becchin. Very kindly, Tanoshimou has provided an English translation for this pattern which you can find here.
Becchin has a fantastic gallery of his Link which you can find here.
There are some great step by step photos of Becchin's pattern here.
Stephanie at All About Ami has also shared photos of her Link creation, and has kindly provided a pattern for Link's Hylian Shield.

A big, huge, ginormous thank you to all those mentioned above! You are all so wonderful!

I made him with 8 ply, 100% acrylic yarn and used 8mm plastic safety eyes. I have pretty much followed Tanoshimou's pattern down to a tee, however I did slightly change a thing or two here and there.

Link's Hat:
Follow the directions up to Row 9.
R10-11 - sc all around (34).
R12 - dec 2, sc 26, dec 2 (30).
R13 - dec 2, sc 18, dec 2 (22).
R14 - sc around counter clockwise.
R15 - sc around clockwise.
R16 - sc all around.

For his hair, I did sc's all the way down the back and chains for his sideburns. I then stitched on his fringe with a yarn needle (Stephanie's blog has great photos for this part!)

Accessories!
What would Link be without his Hylian Shield and Master Sword?
I followed Stephanie's pattern for the Hylian Shield, and created my own Master Sword and sheath:
Sword:
blade (make 2) -
1. ch 15. turn.
2. sc 14. Add an extra sc at the end to make the tip of the sword. Fasten off.
I placed some wire between the two blade pieces and whip stitched them together.

Hilt (is that the right term???) (make 2) -
1. ch 8. turn.
2. sc 7. Fasten off.
Place each hilt piece on either side of the blade approx 3 or 4 stitches from the base of the blade. Whip stitch together.

Sheath:
1. Ch 24. Slst to the first chain.
2. sc around. Fasten off.

For the bit that holds the sword in place-
1. Ch 6. turn.
2. sc 5. Fasten off.
Sew each end on to the sheath.

What I love so much about this pattern is that his head is on a ball and socket joint so you can rotate it into any position. I also love that his boots, hat, shield, sword and sheath all can come off and are not sewed into place. This makes him a great photo-shoot model!

"Never fear Princess Zelda! I will save you from the evil Ganondorf!"


I must confess, I went out to take photos of Link and just before I took my first photo I thought "hey... His sword is in the wrong hand!" So I switched the sword and shield around, took some photos, came inside, looked it up and realised... "Link is a Lefty!!!!"
After all these years, I never once noticed :P
I apologise...


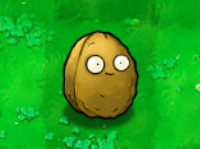
Amigurumi Wall-Nut | Plants vs Zombies

amigurumi crochet wall nut from Plants vs Zombies
Who doesn't love Plants vs Zombies. Seriously. The idea of defending your home from the upcoming zombie apocalypse with mother nature's very own arsenal of weapons is just, well, dandy.

So, in honour of the these fun, delectable characters I have created my very own amigurumi Wall-Nut:

amigurumi crochet wall nut from Plants vs Zombiesamigurumi crochet wall nut from Plants vs Zombies
I had to scrounge through my yarn collection and dig up some things - I ended up using 100% marino wool for the body (thank you spotlight bargain bin!) and some leftover acrylic for the soil. Then with 4ply crochet cotton I stitched on his face and attached white felt eyes. You can buy the terracotta pots from Fickle Prickles, the one I used here is a 4cm pot.

amigurumi crochet wall nut from Plants vs Zombies
Watch out, zombies! Now I have my Wall-Nut to protect me! This means WAR!!!!
da, da, daaaaaaahhhhh...


Blog Design

I have just spruced up the ol' blog design - I am so into retro 50s/60s designs at the moment!!!
I hope you like it :P


And I added pong!!! Now you can play it to your hearts content on the right column of this blog.
Widgets are cool.


Now I just have to wait patiently for my DNS records to kick in so I can have my custom domain name 'close-encounters.com.au' ... come on! Much! Much!

Third Competition Entry - Amigurumi Chocolate Ice-cream Sundae

Keeping in tune with this food theme I have started, my third project I want to enter into Spotlight's competition is this delicious chocolate ice-cream sundae!


Creating the chocolate fudge drips was my favorite part, I experimented with sewing them onto the ice cream scoops using only the back loop of each stitch. This worked so well in creating a three dimensional look, I will definitely have to put this technique into the back of my mind for future projects.

I promise I will put the pattern up for this one once I make another one and take photos of the process.

Does anyone have any suggestions for my next entry, keeping in mind this food theme I seem to be sticking to???

Second Competition Entry - Amigurumi Donuts

For my second entry into Spotlight's competition, I decided to have a go at creating donuts:


Still using the same yarn (100% acrylic and 8ply), I made the donuts with two different coloured icings - Pink (my absolute favorite donut icing on this plan) and chocolate.

I added sprinkles by sewing on long beads with cotton that was the same colour as the icing. I'm really happy with how the sprinkles turned out, I would have thought the thread would have been rather visible, but no, it blended into the icing just perfectly!

If I was to attempt this project again, I would take the time to sew on the icing using only the back loop of each stitch. That way the icing would have a raised appearance and look more three dimensional.

Second project down, what will the next one be????

First Competition Entry - Amigurumi Burger!

I have just completed my first project that I want to enter into Spotlight's competition, and I couldn't wait to share it with you all!


I used the yarn that I bought the other day. Yarn that abides by all the competition's guidelines. It is 100% acrylic, 8ply yarn.

I used the same pattern that I created for my first Ami-burger. This one turned out slightly bigger in size due to the difference in the weight of the yarn, and the fact I used a slightly bigger hook. But all in all, I am really happy with how it turned out!

Yes, it is a little fuzzy around the edges, but that is to be expected from an acrylic yarn, and I shouldn't be too fussy about it.

Yay! First entry done! On to the next!!!

Crochet Competition Supplies

In preparation of my crochet-a-thon to win $10,000 with Spotlight's competition, I went out and purchased a bagillionty balls of yarn!


The brand is moda vera, its all 100% Acrylic and all 8ply in thickness. I bought about 12 different colours - I think that will cover all the projects I want to make for this comp. They were reasonably cheap too, about $3 a ball, and considering the size of them, I think that is great value for money!

I guess my only concern is the fuzziness factor. I usually use cotton to make my projects because they come out so neat and tidy with very little fuzz. But, we will just have to see, I suppose.

I can't wait to start making some projects with these!

Spotlight Knitting Competition 2011!!!

I found out recently that Spotlight has a great competition going on at the moment where you can knit your way to $10 000!

At first, I was a little sad as I don't knit. But apon further investigation on Spotlight's website, I found out you can crochet your projects too!
So ladies and gentleman, it's time to take off those gloves and prep those crochet hooks, because this is gonna be awesome!

Quest for the Perfect Marker

I found the most utterly perfect maker for crochet (and I suppose knitting too) ...
and you will most definitely find one lying around any house where a girl lives!!

I have experimented with so many different DIY makers, from safety pins to men's shirt clips, but nothing was good and/or easy enough to work with.

- The commercial crochet makers you can buy are simply too large for the tiny amigurumi work that I do.
- Safety pins are far too fiddly with having to undo and do them up again at the end of each round.
- Men's shirt clips (which was mentioned on a blog I read somewhere), are so very close to perfect, but fall off all too easy and then you lose your place!

I was almost about to give up and strive to keep count of each individual stitch instead, when... on the eve of one humid, autumn day, I looked over to my bedside table... and there it was...

*insert holy choir harmony*

BOBBY PINS!!!


Bobby pins make the perfect crochet marker! They are small enough to work on finer projects, they don't fall off once put in place and yet they are easy to take off and put on - Hallelujah!

Amigurumi Crochet Voodoo Doll


Stressed at work? Is the boss getting to you? Fear no longer!...
Now you can vent your anger away by shoving rather large pins into something made of yarn (it's okay, its culturally accepted now, you don't have to hide your inner demon anymore...)

WOOT FOR VOODOO DOLLS!!!

I made this little guy in the hopes of brightening up my work day by brightening up my work desk:


Ironically, the idea came to me while I was watching the first season of Dexter on DVD... hmm...
Now I need to make one where you can pull their limbs off and paint their fingernails in different colours... :P


I made this fellow with 8ply yarn and a 3.5mm hook.

I'm hoping to start selling some of my creations on eBay very soon - Stay tuned!!!

Dr Who Tardis Police Box Pattern


I wanted to make a good friend of mine an amigurumi keychain of some kind. So I pondered for a while on what to make him – we both have a fondness for scifi and a tardis from Dr Who just seemed like the logical choice!

Here is how you can make your own:
(I used 3ply crochet cotton and a 2.5mm hook, but you could use any kind of wool and hook – It’s totally up to how big you would like the finished product to be!)

You will need –
Dark blue yarn
White yarn
Crochet hook
White felt
Blue sewing cotton
Yarn needle

How to make –

Side pieces (make 4 in blue colour)
R1 – 8ch, turn
R2-12 – sc in each, 1 ch, turn (8st)
Fasten off, leave long thread for attaching.

Top and Bottom pieces (make 2 in blue colour)
R1 – 8ch, turn
R2-9 – sc in each, 1 ch, turn (8st)
Fasten off, leave long thread for attaching.

Top round piece (make 1 in blue colour)
R1 – make a double loop with 6sc
R2 – 2 sc in each (12st)
R3 – (2sc, sc in next) repeat 6 times (18st)
Fasten off, leave long thread fro attaching

Light piece (make 1 in white colour)
R1 – make a double loop with 6sc
R2 – 2 sc in each (12st)Fasten off, leave long thread for attaching

Putting it together –

· Starting with the 4 side pieces, line up the stitches on the edge and sew together with the thread tails using a whip stitch.

· Cut out 8 small windows out of white felt and sew on with sewing thread. If you sew in the center of the windows both horizontally and vertically, you will get the appearance of 4 small windows per piece of felt. Use back stitch to attach these – it will give you a nice, clean finish.

· Line up and attach the bottom piece with a thread tail using a whip stitch.

· Line up and attach the top piece with a thread tail using a whip stitch (when you only have one side left to stitch, stuff the box with stuffing and sew up remaining side)

· Center the top round piece on top of your box and attach with a thread tail using a whip stitch (again, stuff when you only have a few stitches left to sew and then sew up what remains)

· Center the light piece on top of the round piece and attach with a thread tail using a whip stitch (this one wont require stuffing, if you stick your leftover white thread tails in here it will be full enough)

I attached a small length of ball and chain with a silver link to turn this into a key ring, but the possibilities are endless –

Attach a magnet and use on your fridge.
Attach a lapel pin and pin it to a hand bag, school bag, or your clothes.
Attach a chain and hang it from your car mirror.

I will let you know how it goes when I give it to my friend!!! I hope he likes it!

Num, num - Amigurumi Hamburger

See, now, this is what happens when I have the day off of work and I get bored...

I drink beer.
Then wish for a tasty, tasty hamburger.
BUT, alas, there are no hamburgers within walking distance, and I cannot drive anywhere because of said drinkage state...

So this is what happens:


I make amigurumi hamburgers!!!

They shall hence be known as... Amiburgers!


I will post the pattern for this tasty treat once I have worked out a few kinks.

until then xx

Logo Design

Today I started on the design of my logo. As long as I can remember, I have always wanted to create a business with a pun from my surname Close. I always imagined having my own film production company just so at the end of movie, it would say “This has been a Close Encounter”. As that dream is still a little too far away to think about – I have decided to use this name for my crochet blog, and eventually my online store!

And so it shall be – “Close Encounters of the Crocheted Kind”…

I drew a couple of sketches here and there of a flying saucer with a yarn ball on it, and finally I came up with this design:

I was trying to go for a retro, tacky black and white scifi movie sort of look, complete with dusty film. This is only a draft for the moment, I am going to see where this idea takes me before I decide on a final design.

I am still very undecided on a colour scheme for a website, although I am kinda keen on a old, stained paper look, with sketches on it. So I will have to see where it all goes form here...

Stay cool, kiddies
Peace, Out xx

Hook and Yarn Sizes – Conversion Table

Why do different countries have different names and gauges for EVERYTHING???
It’s so frustrating!!!

While tracking down patterns to crochet, as well as deciding on what thickness of yarn to use and what size hook to use, I get incredibly lost when I see things like ‘use a F hook’ and ‘use worsted weight yarn’. What does it all mean????

Hook sizes
In the US, they have a letter gauge system for their crochet hooks. Here in Australia, you will find all hooks are given a thickness in mm e.g. ‘3.5mm’:


Crochet Hook Size Conversion Table
Metric sizing (mm)
US Sizing
2.00
-
2.25
B
2.50
-
2.75
C
3.00
-
3.25
D
3.50
E
3.75
F
4.00
G
4.50
-
5.00
H
5.50
I
6.00
J
6.50
K
7.00
-
8.00
L
9.00
M
10.00
N

Yarn Types / Sizes Despite the fact that Australia, the UK and the US all speak English, all 3 have different names for yarn types. In Australia we tend to name our yarn based on what ply it is:


Yarn Type / Size Conversion Table
Australia
UK
US
1ply / 2 ply
1 ply / 2 ply
lace weight
2 ply / 3ply
2 ply / 3 ply
baby / fingering
3 ply / 4 ply
3 ply / 4 ply
sport / sock / light weight
8 ply
DK / double knit
light worsted
10 ply
Aran
worsted weight
12 ply
chunky
bulky
14 ply
super chunky
super bulky

Cute Little Flower Pattern

I am having so much fun making cute little cacti amigurumi. And it's all so easy!
The only trouble I'm have at the moment is not being able to find how to make small flowers to put on top of my cacti.

So instead I persevered on my own, and I played around with hdc stitches, and I finally came up with this:


And here is the pattern if you would like to make one yourself:

I used 8 ply yarn (which I pulled apart to create 3 ply piece) and a 2.5mm hook.

1. Make double loop.
2. [Ch2, 5hdc in 2nd chain from hook. Slst in double loop.] Repeat 5 times for 5 petals.
3. Fasten off. Close up double loop.

Now that I think of it, I will try to post up some tutorials on how to do some basic stitches and loops, for those who are just starting out.

Experimenting with Cotton

Up until now, I have been using a nylon/acrylic blend of yarn at 8ply thick. I love that the colours are so vibrant compared to real wool and it the way it makes my projects far neater, but I’m still finding it fuzzes up like wool all too easily. I’m really after a nice clean, fuzz free finish - so I decided to go buy some 3 ply crochet cotton. It’s a little more expensive than the yarn I have been buying previously, so I hope it’s worth the price tag.

Also, because of the thinner ply, I’m hoping that my projects will turn out smaller and hence a lot cuter!

I made another cactus with the cotton. Only this time I used my own design and not a pattern, and here are the results:

It turned out so little! It was the perfect size to fit into a 4cm terracotta pot that I purchased from Fickle Prickles, an online store for cacti and succulents.

I used a smaller hook this time, a 2.5mm hook (I have previously been using 3.5mm).

I really want to find some key ring chains, so I can make some key ring charms out of this cotton!

Fuzzy Koala

So, the other day I found this cute amigurumi koala pattern on the US Woman’s Day Website (I'll forgive them for using the term 'koala bear', hehe). The pattern can be found here:
http://www.womansday.com/Articles/Lifestyle/Crafts/Cuddly-Crochet-Creatures-Koala.html

And here is my version -


For my version, I used fuzzy yarn in a mocha colour to give it a more teddy-bear feel, and I altered the nose and the arms slightly too. I wanted the arms to be attached on a pivot, so they could be moved slightly as opposed to having them the same shape and style as the legs. I used dark brown wool for the arms, nose and inner-ears, and I attached black buttons on top of small circles of brown felt for the eyes.

Here is my pattern for the arms:
R1 – Ch 2, 4sc in 2nd chain from hook
R2 – 2sc in each st (8st)
R3 – In back loops only, sc in each (8st)
R4 – R7 – sc in each. (8st)
Turn inside out.
Stuff.
R8 – Sc in both sides to seal the hole. (4st)
R9 - 10 – Sc in each (you may need to adjust how many rows to add in order to get a nice flat surface to attach to his body)
Attach to body.

I finished the arms off with a French knot at the attachment point to give the look of a pivot point.

I had some trouble getting him to sit up without toppling over, so I stuffed his body with some glass beads I had lying around. It worked great, although I am sure poly beads would be a far cheaper alternative. Again, poly beads seem to be something I can’t find at my local craft store, so I will have to source these on the net. I will let you know if I find a good place.

I really am having so much fun creating these guys. What will my next project be????

Amigurumi Books

I bought several Amigurumi books on Amazon the other week, and they arrived today!!! They are so cute, and the patterns seem really easy to follow. I love them all! Here is what I bought –

Amigurumi World: Seriously Cute Crochet

Amigurumi Two!: Crocheted Toys for Me and You and Baby Too

Yummi 'Gurumi: Over 60 Gourmet Crochet Treats to Make

Creepy Cute Crochet: Zombies, Ninjas, Robots, and More!

Crobots: 20 Amigurumi Robots to Make

Some of the patterns are just the coolest! I will definitely post some photos once I have created one or too… Amazon was by far the cheapest place to get these books that I could find (if you don't mind waiting a long time for them to arrive). Fishpond also had competitive prices on all these books, and free shipping to anywhere in Australia, but they were still not as cheap as Amazon!

Unda tha Sea!

I mentioned before about Ana Paula’s amazing blog where she posts amigurumi patterns for free: http://amigurumipatterns.blogspot.com/

Well, I found my second project from there as well. It is a cute as little jellyfish! You can find the pattern here: http://amigurumipatterns.blogspot.com/2007/10/little-octopus-ornament-to-sweeten-up.html

Here is my finished project:


I am still unable to find any safety eyes here in Australia, so it looks like I am going to have to resort to buying in from overseas. If I find a good one I will let you know.

In the meantime, I made this little guy without a face – and he is still really cute, even without eyes! He would look great hanging from a car revision mirror, or if I made one with finer yarn and a smaller hook, a keychain!

Discovering Amigurumi

I discovered the funkiest thing whilst browsing the internet the other day!

In truth I was looking up something completely irrelevant to the subject, when I magically stumbled across this photo:

And I thought, that is soooo awesome! I wanna make one!

The art form is called Amigurumi, and it derives from Japan. The name is a mix of Japanese words, Ami, meaning crocheted or knitted, and nuigurumi, meaning stuffed doll. It seems the art of Amigurumi has been well practiced all over the world for many years, but here in Australia it seems to have yet to take off. Hopefully that will all change soon!

Anyway, I followed the link from the photo and it led to a blog by Ana Paula, who, funnily enough, posted the crochet pattern for this cute little cactus fellow for free.

Here it is - http://amigurumipatterns.blogspot.com/2007/11/thank-you-little-cactus.html

Well, by the next day, I had wrangled my way to the nearest craft store, bought some yarn and a hook and set to work. IT WAS SO EASY! Within an hour or two, and with hardly any previous crocheting knowledge, I had created my first Amigurumi cactus:

I did have to look up how to do some basic stitches on the internet first, and with some handy hints from my mum (who crocheted liked a madman back in the day!) the process was all in all, very simple. I added some pom-pom balls for flowers on the top there, and I decided to not put a face on this one either (my decision had nothing to do with the fact my craft store didn't have any eyes for sale... really...) .

I can’t wait to see what other patterns I can find. I think I have found my new obsession, and I love it!!!